By popular request, we’ve set out to create a step-by-step guide for using the Virtual Terminal provided by Authorize.Net. Please note, the Virtual Terminal is for keying in transactions manually for things like telephone orders / MOTO (Manual Order, Telephone Order).
Step 1: Log In to your Payment Gateway Account:
Log in at Authorize.Net under MERCHANT. (https://account.authorize.net/)
Step 2: Finding the Virtual Terminal
Once logged in, navigate your dashboard to the TOOLS tab at the top of your page, or do the left side of the page. Once here, click the link labeled “Virtual Terminal”.
Step 3: Overview
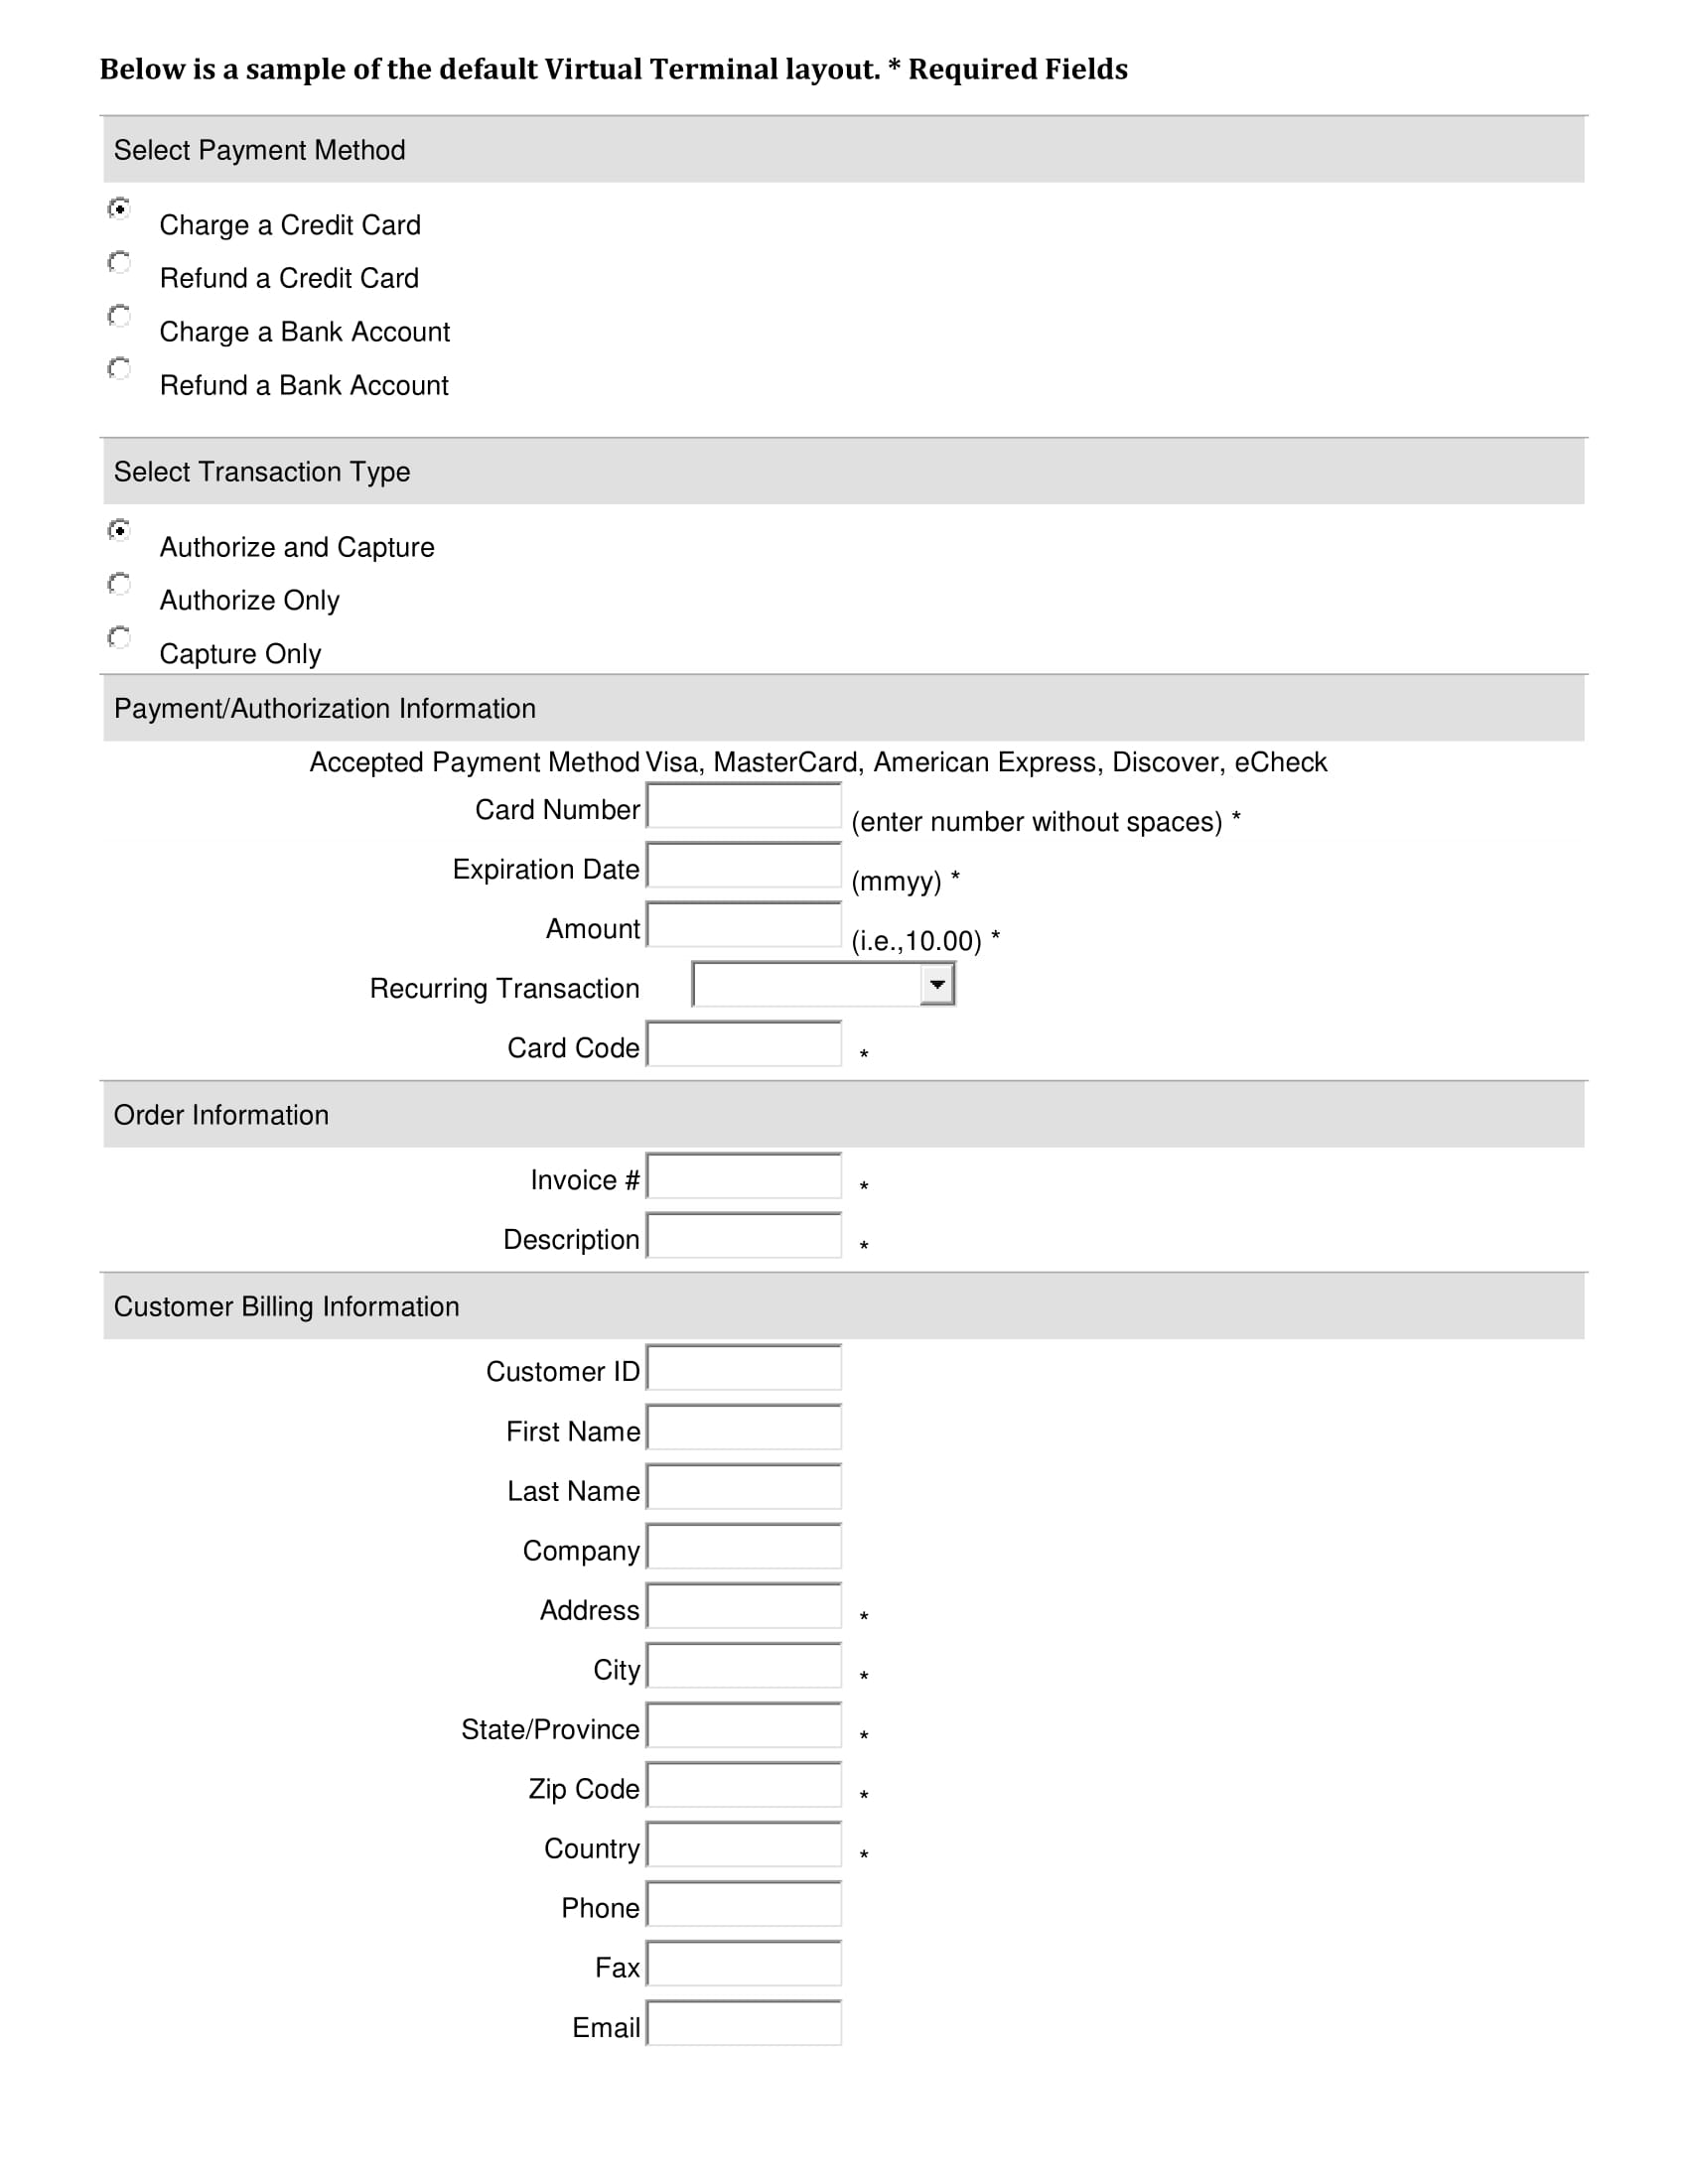
Once inside the virtual terminal page you will see 5 sections highlighted in grey by default. These sections should read “Select Payment Method, Select Transaction Type, Payment/Authorization Information, Order Information, and Customer Billing Information”.
Step 4: Select Payment Method
Under this section you should see 2 to 4 radio buttons, each have a different meaning and by default yours should be set to “Charge a Credit Card”. These are self-explanatory, but we will give a brief description of each:
- Charge a Credit Card – Use this option to authorize and/or capture funds from a credit card.
- Refund a Credit Card – Use this option to refund funds using your customers credit card.
- Charge a Bank Account – Use this option to authorize and/or capture funds from a bank account.
- Refund a Bank Account – Use this option to refund funds using your customers bank account.
Step 5: Select Transaction Type
Under this section you will have up to 3 radio buttons with different transaction methods. To better understand this section, you must first understand the meaning of Authorize and Capture in the payment processing world.
Authorize: The fund’s availability is verified and, if available, they are put on hold automatically. This important step defines the “approved” or “declined” status of a payment process.
Capture: This is the process in which the funds are “captured” and the transfer between the customer and merchant bank has begun.
With this information, you should be able to determine which function you need for your transaction. It is recommended to always Authorize when you want to Capture funds.
*NOTE: Please be aware that by processing a Capture Only transaction, your Merchant Service Provider may charge you a slightly higher discount rate, as this process bypasses a security measure.
Step 6: Payment / Authorization Information
Here you will enter your customers credit card or bank account information.
Step 7: Order Information
Here is where you will input an invoice number (if applicable) and description for the transaction.
*NOTE: If you do not use an invoice number system, it is still recommended to use one for easier transaction look-up if needed in the future.
Step 8: Customer Billing Information
In this section you will fill out your customers billing information as prompted on the screen. If you enter an email address in this section for your customer, they will receive an email receipt of the transaction!
*NOTE: Not all fields are required by default, however, it is highly recommended to fill out all information you can regardless. This helps speed up the back-end authorization of your transaction and the more information provided with a transaction can benefit you by decreasing the time needed to process.
Step 9: Submit
When completed with the above steps you can submit your payment for authorization and processing. With Authorize.Net the typical transaction times can run 24-48 business hours. Once you’ve submitted your payment you will be taken to a screen with the transactions number, you can always find the transaction again by using the transaction search feature at the top of your Authorize.Net homepage.
Bonus: Virtual Terminal Settings
You will find in the bottom left hand corner of the Virtual Terminal page a link for the Virtual Terminal Settings. Here you can customize what fields you would like to see when using the Virtual Terminal and which fields you would like to be required for easier data entry.
*NOTE: Please be aware, this setting is recommended for advance users or those who often frequent their Virtual Terminal. Some settings will ALWAYS be required for the authorize and capture process.
For anyone in need of a visualization of this process, you may find this video link helpful: https://youtu.be/b8hpzDvnvSM